Serial connection to the ReadyNAS 102
Although not officially documented, it is possible to set up a serial connection to the Netgear ReadyNAS 102. For this, one needs:
- A USB-to-TTL converter like this one here. Or this one. Make sure the female pins (the individual wires) are separate, unless you find a TTL plug that looks exactly like the ReadyNAS’s port.
- PuTTY or any other terminal emulator software that supports serial connections like TeraTerm, screen or minicom.
Finding the serial port
The back of the ReadyNAS 102 looks like this:
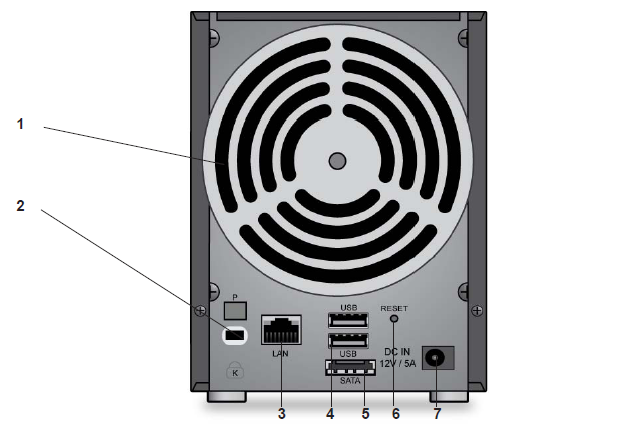
Found it? It’s that mysterious port that’s solely documented by the letter “P”. No idea what the P stands for. Programmer’s interface? Phil Collins?
After taking off the sticker that covers it, you’ll see this:

Physical connection
Here’s a map of the port’s pins:

Hook up the female pins of your USB-to-TTL cable into the correct male pins marked above. My cable is a Prolific PL-2303 XA / HXA, for which the winning combination is:
- Green –> RX
- White –> TX
- Black –> GND
- Red –> +3.3V
Note that the Prolific PL-2303 apparently delivers 5V @ 500mA through the red wire. My knowledge of electronic engineering is very limited, so using this cable for the ReadyNAS was a gamble on my part.
You might have to wiggle about the female pins to get them all connected right. A forceful but careful push may also be necessary. In my case, the serial pins were slanted downwards quite badly out-of-the-box, so getting it all connected without damaging anything was a bit scary.
Update: Arnaud Ebalard has a very detailed write-up on the ReadyNAS 102, including information about its serial port.
Software connection
Connect the cable to your PC via USB and make sure you have the driver, which I had to get from here. Then (for Windows,) find out which COM port the cable is using. You can do this by either:
- Going to the Device Manager > Ports (COM & LPT) and finding your device in the list, or;
- For the Prolific PL-2303, using the ‘checkChipVersion’ tool included in their driver package.
When the cable is properly connected to your PC and the NAS, open your terminal emulator, point it to the right serial device (for Windows: COM port) and have it use the following settings for the serial connection:
- Speed: 115200 baud
- Data bits: 8
- Stop bits: 1
- Parity: None
- Flow control: None
It may or may not be necessary to configure the character set used. This is done in PuTTY under ‘Translation’. UTF-8 worked for me.
Start the connection, plug in your ReadyNAS and watch it boot!